
Arctic Daisy
Arctanthemum arcticum
Grow Time
80-100 days
Sunlight
Full Sun
Watering
Every 5-7 days
Toxicity
Non-toxic
How to plant Arctic Daisy: Step-by-Step Guide
Growing Guide
Preparation
What you'll need:

Arctic Daisy seeds or young plants (check your local garden center or online for availability)

A pot or a garden bed with well-draining soil (this plant likes loose, sandy soil)

Some basic fertilizer (a general-purpose one will work fine)
When to start:
The Arctic Daisy is pretty tough and can handle cooler temperatures, but it still prefers the growing season to be during spring or early summer. If you're starting with seeds, begin indoors about 6–8 weeks before the last frost date in your area. Once the weather warms up and there’s no risk of frost, you can move them outside.
Finding a good spot:
Even though it's called the "Arctic" Daisy, this plant still loves sunlight! Find a spot that gets at least 6 hours of direct sunlight each day. If you’re planting in pots, make sure they have drainage holes so the roots don't sit in water. Too much moisture can harm the plant.
Tip: Arctic Daisies are hardy, but if you live in a very hot climate, try to give them some afternoon shade to prevent overheating.
Planting
If you have seeds:
- Start by filling small pots or seed trays with moist soil.
- Sprinkle the seeds on top of the soil—don’t bury them too deep. Just press them lightly into the surface.
- Water gently to keep the soil moist but not soggy.
- Place the pots in a sunny window or under grow lights.
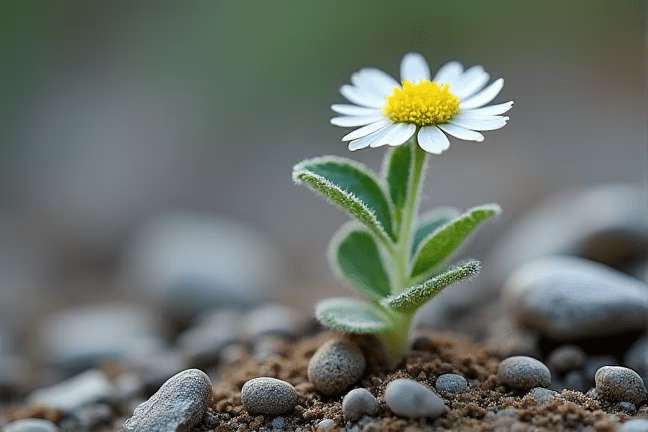
- After about 7–14 days, you should see little sprouts popping up.
- Once the seedlings are big enough (about 2 inches tall), you can transplant them into larger pots or directly into your garden.
If you have young plants:
- Dig a hole in your garden bed or pot that’s slightly larger than the root ball of the plant.
- Gently place the plant into the hole, making sure the top of the root ball is level with the soil surface.
- Fill the hole with soil and pat it down gently around the base of the plant.
- Water thoroughly right after planting to help the roots settle in.
Planting tips:
- Space the plants about 10–12 inches apart if you’re planting them in a garden bed. This gives them room to grow without overcrowding.
- If you’re using pots, one plant per medium-sized pot is ideal.
- After planting, sprinkle a bit of fertilizer around the base of the plant and mix it lightly into the soil.
Growing Care
Watering:
- Arctic Daisies don’t like wet feet! Water when the top inch of soil feels dry to the touch.
- Water deeply but infrequently—this encourages the roots to grow deeper into the soil.
- Always water at the base of the plant rather than over the leaves to avoid mold or mildew issues.
Feeding time:
- Use a balanced fertilizer every 4–6 weeks during the growing season (spring through early fall).
- Be careful not to over-fertilize. Too much food can lead to lots of leafy growth but fewer flowers.
Sunlight and temperature:
- These daisies love full sun, so make sure they get plenty of light throughout the day.
- They can tolerate cooler temperatures, but if you live in an area with scorching summers, provide some light shade during the hottest part of the day.
Minor problem solving:
- Yellowing leaves? You might be overwatering. Let the soil dry out a bit more between waterings.
- Not blooming? Ensure the plant is getting enough sunlight and isn’t being overshadowed by other plants.
- Pests? Arctic Daisies are pretty pest-resistant, but if you notice aphids or other bugs, spray them off with water or use insecticidal soap.
Harvesting
Wait, do I harvest Arctic Daisies?
Technically, you don’t “harvest” Arctic Daisies the way you would with vegetables or herbs since they’re ornamental flowers. But you can enjoy their beauty in your garden or cut them to bring indoors for bouquets!
When to cut flowers:
- The best time to cut Arctic Daisy blooms is early in the morning when they’re most hydrated.
- Use sharp scissors or pruning shears to snip the stems just above a leaf node (where the leaves meet the stem).
- Cut flowers will last longer if you place them in water immediately after cutting.
Deadheading:
- To encourage more blooms, remove spent flowers by pinching or cutting them off just below the flower head.
- Deadheading helps the plant focus its energy on producing new flowers instead of making seeds.
End of season care:
- As the weather cools down and the plant stops flowering, you can cut back the stems to about 2 inches above the ground.
- Cover the base with a light layer of mulch to protect the roots during winter if you live in a colder climate.
Plant Care FAQ
Q: Can Arctic Daisies survive frost?
A: Yes, they’re quite cold-hardy! While they prefer cool climates, they can withstand light frosts. However, if a hard freeze is expected, it’s a good idea to cover them with a frost cloth or bring potted plants indoors temporarily.
Q: Why isn’t my Arctic Daisy blooming?
A: There could be a few reasons:
- It might not be getting enough sunlight. Make sure it’s in a spot with at least 6 hours of sun daily.
- Over-fertilizing can also cause the plant to focus on leaf growth rather than flowers. Stick to feeding every 4–6 weeks.
Q: How do I know if I’m overwatering?
A: Yellowing leaves and wilting (even when the soil is wet) are common signs of overwatering. Let the soil dry out more between waterings, and ensure your pot or garden bed has proper drainage.
Q: Can I grow Arctic Daisies indoors?
A: Yes, but they’ll need lots of sunlight. A south-facing window is ideal. If you don’t have enough natural light, consider using grow lights.
Q: Are Arctic Daisies deer-resistant?
A: Yes! These flowers are generally avoided by deer, making them a great choice for gardens where deer are common visitors.
Pro Tips
1. Companion planting
Arctic Daisies look beautiful alongside other cool-weather plants like pansies or snapdragons. Plus, planting them together can create a lovely cottage-garden feel.2. Divide and conquer
Every 2–3 years, you can divide mature Arctic Daisy plants to prevent overcrowding and rejuvenate their growth. Early spring is the best time to do this.3. Cut flower tip
If you want your cut Arctic Daisies to last longer in a vase, trim the stems at a 45-degree angle and change the water every couple of days.4. Soil check
Arctic Daisies prefer slightly acidic to neutral soil (pH 6.0–7.0). If you’re unsure about your soil pH, a simple test kit from the garden center can help.5. Winter protection
In colder regions, adding a layer of straw or pine needles around the base of the plant can help insulate the roots during harsh winters.6. Natural pest deterrent
Planting garlic or onions nearby can help deter pests that might bother your Arctic Daisies.7. Easy propagation
Arctic Daisies can be propagated by division or even softwood cuttings taken in late spring. It’s an easy way to get more plants for free!