
Black-eyed Susan
Rudbeckia hirta
Grow Time
60-90 days
Sunlight
Full Sun
Watering
Every 5-7 days
Toxicity
Non-toxic
Video content from YouTube
Watch on YouTubeHow to plant Black-eyed Susan: Step-by-Step Guide
Growing Guide
Preparation
What you'll need:

Black-eyed Susan seeds (or small seedlings if you want to skip the germination stage)

A garden bed or large pot with good drainage

Regular garden soil (they're not too picky about soil, but it should drain well)
- A spot that gets plenty of sunlight
When to start:
Black-eyed Susans love warm weather, so spring is the ideal time to plant them. If you're starting from seeds, you can begin indoors about 6 weeks before the last frost in your area, or sow them directly into the garden after the danger of frost has passed.
Choosing a good spot:
These flowers thrive in full sun, so look for a location that gets at least 6 hours of direct sunlight each day. They can handle partial shade, but the more sun they get, the better they'll bloom. If you're using a pot, make sure it has drainage holes to prevent waterlogging.
Tip: If your soil feels heavy or clay-like, mix in some sand or compost to help it drain better.
Planting
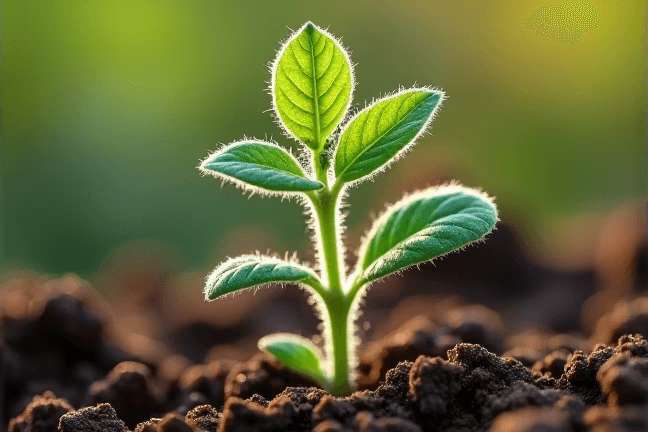
If you have seeds:
- Start by sprinkling the seeds on top of the soil in your garden or pot.
- Lightly cover them with a thin layer of soil—just enough to barely hide the seeds.
- Water gently to keep the soil moist but not soggy.
- If you're starting seeds indoors, place them in a sunny window or under grow lights.
- Seeds will usually sprout in about 7-14 days.
- Once the seedlings are a few inches tall and have a couple of leaves, they're ready to transplant outdoors if you started them inside.
If you have seedlings:
- Dig a hole in your garden bed or pot that's slightly larger than the root ball of the seedling.
- Place the seedling in the hole, making sure the top of the root ball is level with the surrounding soil.
- Gently pat down the soil around the plant to secure it in place.
- Water thoroughly right after planting.
Planting tips:
- Space your plants about 12-18 inches apart to give them room to grow and spread.
- If planting in pots, use one plant per medium-sized pot to avoid overcrowding.
- After planting, sprinkle a bit of compost or light fertilizer around the base of the plant to give it a little boost.
Growing Care


Watering:
- Black-eyed Susans are pretty drought-tolerant once established, but during their first growing season, keep the soil lightly moist.
- Water when the top inch of soil feels dry, which might be every 2-3 days in hot weather or weekly in cooler conditions.
- Always water at the base of the plant to avoid wetting the leaves, as this can lead to mold or mildew issues.
Feeding:
- These plants don’t need much fertilizer. You can feed them once in early spring with a balanced, all-purpose fertilizer.
- If you notice slow growth or fewer blooms, a light feeding midsummer can help, but don't overdo it—too much fertilizer can lead to lots of leaves but fewer flowers.
Sunlight and temperature:
- As mentioned earlier, these flowers love sunlight. The more sun they get, the more they'll bloom.
- They can tolerate heat quite well, but if you live in an area with very hot summers, a bit of afternoon shade won't hurt.
Minor problem solving:
- Yellowing leaves? This could mean too much water. Let the soil dry out a bit before watering again.
- Not blooming? Make sure the plant is getting enough sunlight. Also, avoid over-fertilizing, as too much nitrogen can reduce flowering.
- Pests? Black-eyed Susans are generally pest-resistant, but if you see aphids or other bugs, a spray of water or insecticidal soap should take care of them.
Harvesting
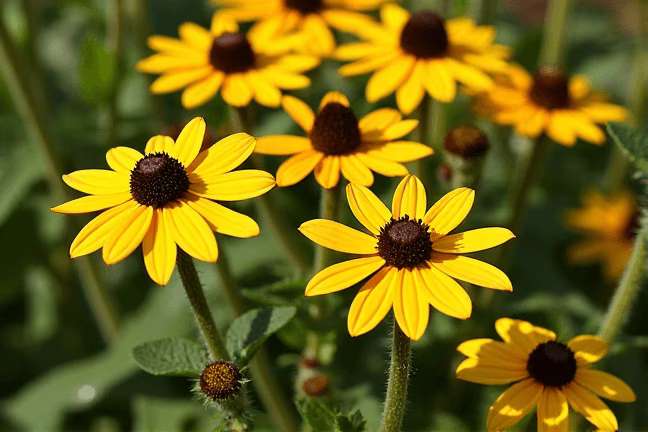
When to enjoy the blooms:
- Black-eyed Susans typically bloom from early summer through fall, depending on your climate.
- They’re most beautiful when they’ve fully opened, showing off their bright yellow petals with dark brown centers.
How to cut flowers:
- If you want to bring some blooms indoors for a bouquet, cut the stems early in the morning when the flowers are freshest.
- Use sharp scissors or pruners to cut the stem at an angle, leaving enough length for arranging in a vase.
- Remove any leaves that would be submerged in water to prevent rot.
Deadheading for more blooms:
- To encourage more flowers throughout the season, regularly "deadhead" the plant by cutting off spent blooms just above the nearest leaf node.
- Deadheading prevents the plant from putting energy into seed production and instead focuses on producing new flowers.
End-of-season care:
- Once the blooming season is over, you can either leave the seed heads on the plant to attract birds or cut them back to tidy up the garden.
- In colder climates, mulch around the base of the plant in late fall to protect the roots over winter.
Plant Care FAQ
Q: Do Black-eyed Susans come back every year?
A: Yes! Black-eyed Susans are perennials in many areas (zones 4-9), meaning they’ll return year after year. In colder zones, they may act like annuals, but they often reseed themselves naturally.
Q: Can I grow them in containers?
A: Absolutely! Just make sure the container is large enough (at least 12 inches wide) and has good drainage. They do well in pots as long as you provide enough sunlight and water.
Q: Why are the leaves turning brown?
A: Brown leaves could indicate a few things: overwatering, poor drainage, or a fungal issue. Make sure the soil isn’t staying too wet and that your pot or garden bed drains well. If it’s a fungal problem, remove affected leaves and consider treating with a fungicide.
Q: Are Black-eyed Susans invasive?
A: They can spread through seeds, but they’re not considered highly invasive. If you don’t want them spreading too much, simply deadhead the flowers before they go to seed.
Q: How do I divide Black-eyed Susans?
A: Every few years, you can dig up the clump in early spring or fall, separate the root ball into smaller sections, and replant them. This helps keep the plant healthy and gives you more plants!
Pro Tips
1. Companion planting
Plant Black-eyed Susans near vegetables like tomatoes or peppers; they attract pollinators, which can improve your harvest.2. Natural pest control
Black-eyed Susans are deer-resistant and rabbit-resistant, making them great for gardens where critters are a problem.3. Cut flower tip
To make cut flowers last longer in a vase, change the water every couple of days and trim the stems slightly each time.4. Seed collecting
If you want to save seeds, let some flowers go to seed in the fall. Collect the dried seed heads, break them open, and store the seeds in a cool, dry place for next year.5. Low-maintenance beauty
These flowers are perfect for beginners because they don’t require constant care and still reward you with vibrant blooms.6. Winter interest
Leaving the seed heads on through winter not only feeds birds but also adds visual interest to your garden when everything else is dormant.7. Mulching trick
Use a light layer of mulch around the base of the plant to keep weeds down and retain moisture, but avoid piling it against the stems to prevent rot.