
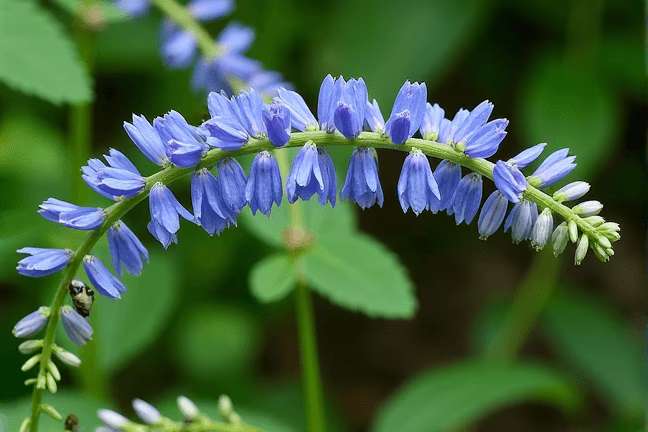
Blue Skullcap
Scutellaria lateriflora
Grow Time
90-120 days
Sunlight
Partial Shade
Watering
Every 5-7 days
Toxicity
Non-toxic
How to plant Blue Skullcap: Step-by-Step Guide
Growing Guide
Preparation
What you'll need:

Blue Skullcap seeds or young plants (you can find these at nurseries or online)

A pot or garden space (it doesn’t need to be too big, but make sure it has good drainage)

Soil that holds moisture well but isn’t waterlogged (a mix of regular garden soil and compost works great)

Watering can or hose with a gentle spray setting
When to start:
Blue Skullcap loves cooler weather. If you're starting from seed, the best time is early spring when the ground begins to warm up. If you're in a warmer area, you might also try planting in late summer or early fall.
Choosing the right spot:
Blue Skullcap prefers partial shade, especially in hotter climates. If you’re growing it outdoors, pick a spot where it gets some morning sun but is shaded during the hottest part of the day. If you're using pots, place them in a location where they get filtered sunlight throughout the day.
Tip: If you live in a very sunny area, adding a bit of mulch around the plant will help keep the soil cool and moist.
Planting
If you have seeds:
- Start by sprinkling the seeds over the soil surface—don't bury them too deep; just press them gently into the soil.
- Lightly cover the seeds with a thin layer of soil (about 1/8 inch).
- Water the soil lightly to keep it moist but not soggy.
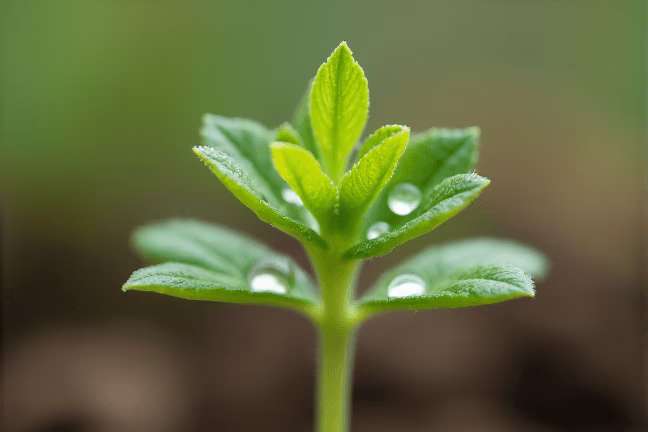
- Keep the seeds in a cool, shady spot until they germinate, which usually takes about 2-3 weeks.
- Once the seedlings are about 2 inches tall, you can transplant them into larger pots or directly into the garden.
If you have young plants:
- Dig a hole slightly bigger than the root ball of the plant.
- Place the plant in the hole and gently fill in with soil, making sure the top of the root ball is level with the surrounding soil.
- Press down lightly around the base of the plant to secure it.
- Water thoroughly after planting to help the roots settle in.
Planting tips:
- Space your plants about 12-18 inches apart if planting in the ground so they have room to grow.
- If using pots, choose one that’s at least 10 inches wide to give the roots plenty of space.
- Adding a bit of compost to the soil before planting can give your Blue Skullcap a nutrient boost.
Growing Care


Watering:
- Blue Skullcap likes consistently moist soil, so check it every few days, especially if it’s hot or dry.
- Water deeply but don’t let the soil become waterlogged. Aim for the soil to feel like a damp sponge.
- If you notice the leaves wilting, it’s a sign your plant needs more water.
Sunlight:
- While Blue Skullcap can tolerate some sun, it really thrives in partial shade. Too much direct sunlight, especially in the afternoon, can stress the plant.
- If your plant starts looking a bit dry or burnt, consider moving it to a shadier spot or adding some shade cloth.
Feeding:
- You don’t need to fertilize Blue Skullcap often. In fact, too much fertilizer can harm it. Once a year, you can add a small amount of organic compost around the base of the plant to keep it healthy.
- Avoid chemical fertilizers as they can be too strong for this plant.
Pruning:
- Prune your Blue Skullcap in early spring to encourage new growth. Simply cut back any dead or leggy stems to about 6 inches above the ground.
- This helps the plant stay bushy and promotes more flowering.
Harvesting
When to harvest:
- The best time to harvest Blue Skullcap is when it’s flowering, usually in late spring to early summer. This is when the plant’s medicinal properties are at their peak.
- Look for vibrant blue flowers along the stems—these are the parts you’ll want to collect.
How to harvest:
- Use clean scissors or pruning shears to snip off the top portions of the plant, including the flowers and a few inches of stem.
- Be careful not to take too much from one plant—leave enough foliage so the plant can continue to grow and thrive.
Drying and storing:
- After harvesting, tie the stems together in small bundles and hang them upside down in a cool, dry, and well-ventilated area.
- Once the leaves and flowers are completely dry (this usually takes about 1-2 weeks), you can store them in an airtight container.
- Keep the dried Blue Skullcap in a cool, dark place, and it should last for up to a year.
Tip: Dried Blue Skullcap can be used to make teas or tinctures, but always consult with a healthcare professional before using it medicinally.
Plant Care FAQ
Q: My Blue Skullcap’s leaves are turning yellow. What’s wrong?
A: Yellow leaves could mean your plant is getting too much water or not enough nutrients. Make sure the soil is moist but not soggy, and consider adding a bit of compost to replenish nutrients.
Q: Can I grow Blue Skullcap indoors?
A: Yes, you can! Just make sure it gets plenty of indirect light and keep the soil consistently moist. A bright windowsill or under grow lights would work well.
Q: Why isn’t my Blue Skullcap flowering?
A: Blue Skullcap may not flower if it’s not getting enough sunlight or if it’s too crowded. Try giving it a bit more light and ensure there’s enough space between plants for air circulation.
Q: Is Blue Skullcap invasive?
A: No, Blue Skullcap isn’t considered invasive. It spreads slowly through seeds and self-seeding, so you don’t have to worry about it taking over your garden.
Q: Can I divide my Blue Skullcap plant?
A: Yes, you can divide mature plants in early spring. Carefully dig up the plant and split the root ball into two or three sections, then replant each section. This can help rejuvenate older plants.
Pro Tips
1. Companion Planting
Blue Skullcap grows well alongside other moisture-loving plants like mint or lemon balm. Just be mindful that mint can spread quickly, so it’s better to keep it in its own pot.2. Natural Pest Control
Blue Skullcap is generally pest-resistant, but if you notice aphids, spraying the plant with a mix of water and a few drops of dish soap can help deter them naturally.3. Mulching Tip
Adding a layer of organic mulch around your Blue Skullcap helps retain moisture and keeps the roots cool, especially during hot summer months.4. Easy Overwintering
If you live in a colder climate, you can bring potted Blue Skullcap indoors during the winter. Place it near a window with indirect light and reduce watering.5. Encourage Re-Seeding
Allow a few flowers to go to seed at the end of the season. This way, new plants may pop up on their own next spring!6. Space-Saving Tip
If you’re short on garden space, Blue Skullcap grows beautifully in containers. Just make sure the pot has good drainage and is large enough to accommodate its root system.7. Enjoy the Flowers
Besides being useful for herbal remedies, Blue Skullcap’s flowers attract pollinators like bees and butterflies, making your garden even livelier!