
Fragrant Plantain Lily
Hosta plantaginea
Grow Time
60-90 days
Sunlight
Partial to Full Shade
Watering
Every 3-5 days
Toxicity
Mildly toxic
Video content from YouTube
Watch on YouTubeHow to plant Fragrant Plantain Lily: Step-by-Step Guide
Growing Guide
Preparation
What you'll need:

A pot or garden space with rich, well-draining soil
Compost or organic matter to enrich the soil

Shovel or trowel for digging

Mulch (wood chips or shredded leaves work well)
- Fragrant Plantain Lily (Hosta plantaginea) bulbs or young plants
When to start:
Spring is the ideal time to plant Fragrant Plantain Lilies. If you live in a cooler climate, wait until the frost has passed and the soil feels warm. In warmer climates, early spring or even fall works fine too.
Choosing the right spot:
These plants love shade or partial shade. While they can tolerate some morning sun, they thrive best in areas that get dappled light throughout the day. Think of spots under trees or near shaded corners of your yard. If planting in pots, place them where they won’t get direct afternoon sunlight.
Planting
If you're using bulbs:
- Dig a hole about 2 inches deeper than the bulb's height.
- Place the bulb in the hole with the pointy side facing up.
- Fill the hole with soil, gently pressing it down around the bulb.
- Water the area to settle the soil but don’t overwater.
If you're using young plants:
- Dig a hole slightly larger than the root ball of the plant.
- Place the plant in the hole so that the top of the root ball is level with the surrounding soil.
- Fill in the hole with soil and press lightly to remove air pockets.
- Give the plant a good watering to help it settle into its new home.
Spacing tip:
If you’re planting multiple Fragrant Plantain Lilies, leave about 18 to 24 inches between each one. This gives their large leaves enough room to spread out without overcrowding.
Growing Care


Watering:
- Hostas like consistently moist soil, but not soggy. Aim to water when the top inch of soil feels dry to the touch.
- During hot, dry spells, water more frequently to keep the soil from drying out completely.
- Morning is the best time to water, as this allows any moisture on the leaves to dry before evening.
Mulching:
- After planting, spread a layer of mulch (about 2 inches thick) around the base of the plant. This helps retain moisture, keeps the soil cool, and prevents weeds.
- Avoid piling mulch directly against the stems to prevent rot.
Fertilizing:
- Feed your Hostas once in early spring with a balanced, slow-release fertilizer. You can also use compost to give them a nutrient boost.
- Be careful not to over-fertilize—too much can lead to weak growth and fewer flowers.
Dealing with pests:
- Slugs and snails love Hostas! To protect your plants, sprinkle crushed eggshells or diatomaceous earth around the base of the plant. You can also set up beer traps nearby to catch these critters.
- Deer might nibble on Hostas too. If deer are a problem in your area, consider using a natural deer repellent spray or planting Hostas in less accessible areas.
Harvesting
No harvesting here!
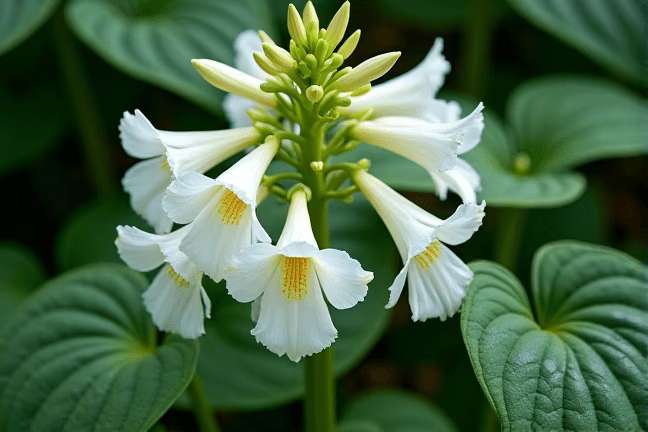
The Fragrant Plantain Lily is grown mainly for its lush foliage and beautiful, fragrant flowers, not for edible parts. So there’s no “harvesting” step with this plant. However, if you want to enjoy cut flowers indoors:
- When the plant blooms (usually in late summer), you can snip a few flower stalks to bring inside.
- Cut the stalks early in the morning when the flowers are fresh and place them in a vase with water.
Remember, leaving the flowers on the plant will allow you to enjoy their fragrance outdoors for weeks!
Plant Care FAQ
Q: Why are my Hosta leaves turning yellow?
A: Yellowing leaves could be a sign of overwatering or poor drainage. Make sure your soil isn’t staying too wet for too long. It could also mean your plant is getting too much direct sunlight, which Hostas don’t like.
Q: Can I divide my Hosta plant?
A: Yes! Hostas can be divided every few years to keep them healthy and promote new growth. The best time to do this is in early spring when new shoots are just starting to emerge. Carefully dig up the plant, split the root ball into sections, and replant them.
Q: How do I prepare my Hostas for winter?
A: Hostas are hardy plants and will naturally die back in the fall. Once the leaves have turned brown, you can cut them back to ground level. Cover the area with a light layer of mulch to protect the roots during the colder months.
Q: Why aren’t my Hostas blooming?
A: Some Hosta varieties take a while to mature before they bloom. Also, too much shade can reduce flowering. Ensure your plants are getting at least some morning sun or filtered light throughout the day.
Q: Can Hostas grow in containers?
A: Absolutely! Just make sure the container is large enough (at least 12 inches deep and wide) and has good drainage holes. Hostas in pots may need more frequent watering since containers dry out faster than garden soil.
Pro Tips
1. Choose the right variety
There are many types of Hostas with different leaf colors and sizes. For beginners, look for easy-to-grow varieties like 'Sum and Substance' or 'Francee.'2. Companion planting
Pair Hostas with other shade-loving plants like ferns or astilbes. They’ll complement each other beautifully and create a lush, layered look.3. Keep an eye on slugs
Check your Hostas regularly for slug damage, especially after rainy days. A simple trick is to place a small saucer of beer near the plant—slugs are attracted to it and will drown.4. Foliage first
Remember, Hostas are primarily grown for their stunning leaves rather than their flowers. Focus on keeping the foliage healthy and vibrant.5. Divide and conquer
Dividing your Hostas every 3-4 years not only keeps them healthy but also gives you new plants to expand your garden or share with friends!6. Don’t rush the blooms
The flowers of Hosta plantaginea are worth the wait—they’re fragrant and bloom later in the season, usually in late summer. Be patient and let them shine when they’re ready!7. Protect from harsh sun
Even though some Hostas can handle a bit of sun, too much direct sunlight can scorch their leaves. If you notice browning edges, try moving the plant to a shadier spot or provide some cover during the hottest part of the day.