Garlic
Allium sativum
Grow Time
180-240 days
Sunlight
Full Sun
Watering
Every 7-10 days
Toxicity
Non-toxic
Video content from YouTube
Watch on YouTubeHow to plant Garlic: Step-by-Step Guide
Growing Guide
Preparation

What you'll need:

Garlic cloves (not the ones from the grocery store, as they may have been treated to prevent sprouting; instead, get them from a garden center or seed supplier)

A sunny spot in your garden or a large pot (at least 8-10 inches deep)

Well-draining soil (you can mix regular garden soil with some compost or sand for better drainage)

A small trowel or your hands for planting

Mulch (straw, leaves, or grass clippings work well)
When to start:
Garlic is unique because it’s best planted in fall—around October to November—so it has time to establish roots before winter. If you live in a warmer climate, you can also plant garlic in early spring, but fall planting usually gives you bigger bulbs.
Choosing the right cloves:
Look for firm, healthy garlic bulbs without any soft spots or mold. Break the bulb into individual cloves just before planting, keeping the papery skin intact on each clove. Larger cloves tend to grow larger bulbs, so save the smaller ones for cooking!
Preparing the soil:
Garlic likes loose, well-draining soil that’s rich in organic matter. If your soil feels too heavy or clay-like, mix in some compost or sand to loosen it up. Garlic doesn’t like “wet feet,” so good drainage is key!
Planting

Step-by-step planting:
- Break the bulb: Just before planting, separate the garlic bulb into individual cloves. Be gentle to avoid damaging the papery skin.
- Dig a hole: Use your trowel to dig small holes in the soil about 2 inches deep and 6 inches apart. If you’re planting in rows, leave about 12 inches between rows to give the plants space to grow.
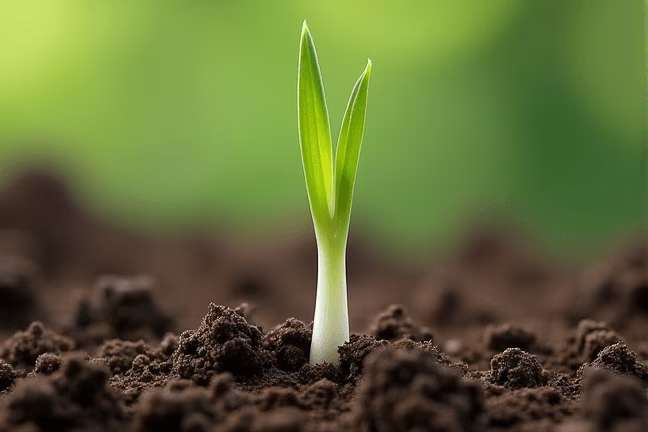
- Plant the cloves: Place each clove in the hole with the pointy end facing up (this is where the green shoot will emerge). Cover the clove with soil and gently pat it down.
- Mulch the soil: After planting, cover the soil with a layer of mulch (like straw or leaves) to help retain moisture, regulate soil temperature, and prevent weeds. This is especially important if you’re planting in the fall.
- Water lightly: Give the soil a gentle watering after planting, but don’t overdo it. You want the soil to be moist, not soggy.
Tip: If you’re planting in pots, make sure the container has drainage holes at the bottom. Plant cloves about 6 inches apart in the pot, and fill it with well-draining soil.
Growing Care


Watering:
Garlic doesn’t need constant watering like some other plants. Water every 3-5 days, depending on how dry the soil feels. The goal is to keep the soil moist but not waterlogged. Overwatering can cause the bulbs to rot, so always check the soil before giving it more water.
Weeding:
Garlic doesn’t like competition from weeds. Keep the area around your plants weed-free by gently pulling out any unwanted plants. The mulch you added earlier should help suppress weeds, but keep an eye out!
Fertilizing:
Garlic is a light feeder, so you don’t need to fertilize often. Around mid-spring, when the garlic starts sending up green shoots, you can sprinkle a bit of all-purpose fertilizer or compost around the base of the plants. Avoid over-fertilizing—too much nitrogen can lead to lush green growth but smaller bulbs.
Sunlight:
Garlic loves full sun! Make sure your plants get at least 6-8 hours of direct sunlight each day. If you’re growing in pots, place them in the sunniest spot you have, like a south-facing balcony or windowsill.
Pest control:
Garlic is generally pest-resistant, but occasionally you might see onion maggots or aphids. If you notice any pests, you can spray the plants with a mixture of water and mild dish soap to deter them. Companion planting with herbs like chamomile or mint can also help repel bugs naturally.
Harvesting


When to harvest:
You’ll know your garlic is ready to harvest when the lower leaves start turning yellow and brown, usually around late spring to early summer (May to July, depending on your climate). Don’t wait too long, though—if the leaves completely die back, the bulbs may split open, which shortens their storage life.
How to harvest:
- Loosen the soil: Use a small garden fork or trowel to gently loosen the soil around the bulb. Be careful not to stab the bulb with your tool!
- Lift the bulb: Once the soil is loose, carefully lift the garlic bulb out of the ground by pulling on the stem. Try not to yank it too hard—garlic bulbs can bruise easily.
- Shake off excess dirt: Gently shake off any loose soil from the bulb, but don’t wash it with water yet. Wet bulbs are harder to cure and store.
Curing the garlic:
After harvesting, garlic needs to “cure” before you store it. Lay the bulbs out in a warm, dry, and well-ventilated area (like a garage or shed) for about 2-3 weeks. You can hang them in bunches or lay them out on a screen or rack. Avoid direct sunlight during this time.
Once the outer skin is dry and papery, trim the roots and stems, and your garlic is ready to store!
Plant Care FAQ
Q: Can I plant garlic in the spring instead of fall?
A: Yes, you can plant garlic in early spring, but fall-planted garlic usually produces larger bulbs because it has more time to develop roots before the growing season. If you plant in spring, do it as soon as the ground thaws.
Q: Why are my garlic plants turning yellow?
A: Yellowing leaves can mean a few things. It could be natural as the plant matures and prepares for harvest. However, if it happens too early, it might be due to overwatering, poor drainage, or a lack of nutrients. Check the soil moisture and consider adding some compost or fertilizer.
Q: How do I store garlic after harvesting?
A: Store cured garlic in a cool, dry, and dark place (like a pantry or cupboard). Don’t put it in the fridge, as moisture can cause it to sprout. Properly stored garlic can last for several months.
Q: My garlic bulbs are small. What went wrong?
A: Small bulbs can happen for several reasons: overcrowding, poor soil, insufficient sunlight, or planting too late in the season. Next time, try spacing the cloves further apart, using richer soil, and planting earlier in the fall.
Q: Can I grow garlic indoors?
A: Garlic can be grown indoors, but it’s tricky to get full-sized bulbs because they need a cold period to trigger bulb formation. If you want to try, use a deep pot with well-draining soil and place it in the sunniest window you have. Alternatively, you can grow garlic greens (the shoots) indoors for cooking!
Pro Tips
1. Save your own seed garlic
After harvesting, save some of your best bulbs for planting next season. This way, you’ll always have garlic to plant year after year!2. Softneck vs. Hardneck garlic
Softneck garlic stores longer and is better for braiding, while hardneck garlic tends to produce larger cloves and a milder flavor. Choose based on your taste preference and climate.3. Grow garlic greens
If you don’t want to wait for full bulbs, you can grow garlic greens! Simply plant cloves close together and harvest the green shoots like chives after a few weeks.4. Companion planting
Garlic is a great companion plant for roses, tomatoes, and peppers because it helps repel pests. Avoid planting it near beans or peas, as it can stunt their growth.5. Test your soil drainage
Before planting, test your soil’s drainage by digging a small hole and filling it with water. If the water drains within a few hours, your soil is good to go. If it takes longer, mix in some sand or compost.6. Don’t remove the scapes!
If you’re growing hardneck garlic, it will produce a flower stalk called a “scape.” Cut these off when they appear to direct more energy into bulb growth. Bonus: Scapes are delicious sautéed or grilled!7. Rotate your crops
Don’t plant garlic (or any allium family plant) in the same spot year after year. Rotating crops helps prevent soil-borne diseases and nutrient depletion.