
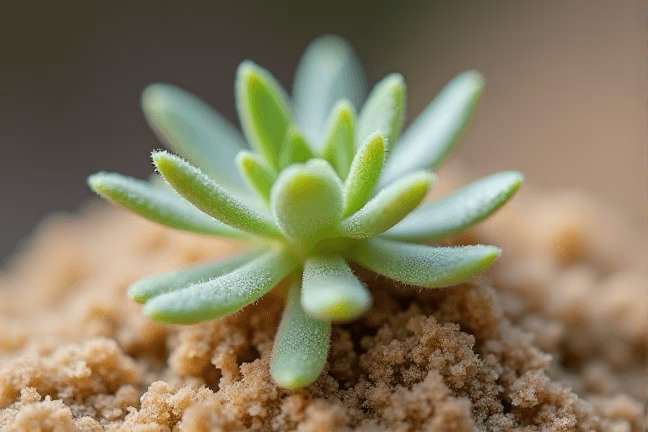
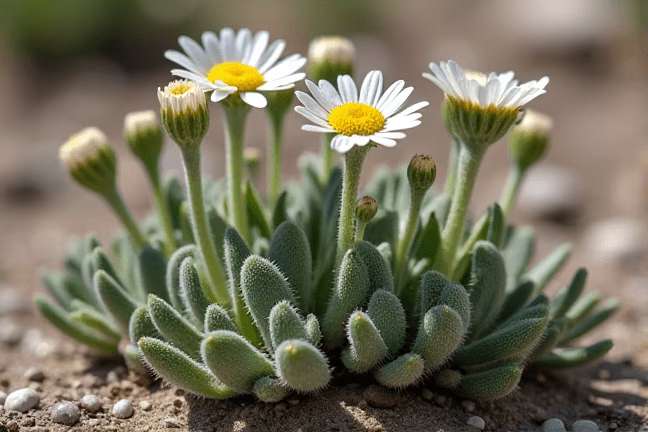
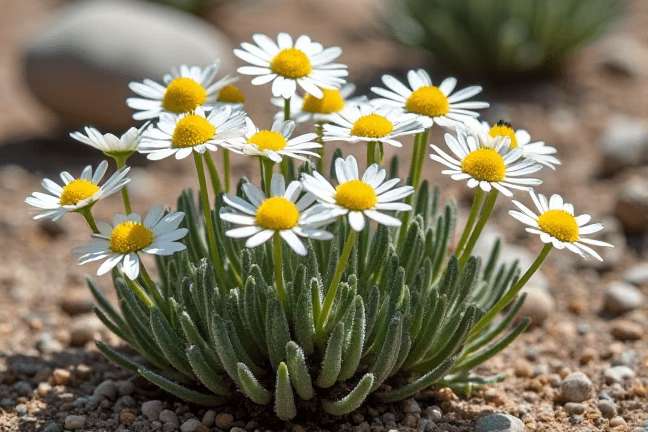
Last Chance Townsend Daisy
Townsendia aprica
Grow Time
45-60 days
Sunlight
Full Sun
Watering
Every 7-14 days
Toxicity
Non-toxic
How to plant Last Chance Townsend Daisy: Step-by-Step Guide
Growing Guide
Preparation
What you'll need:

Seeds or young plants of the Last Chance Townsend Daisy (you can find these at specialty nurseries or online)

Well-draining soil (a mix of regular potting soil with some sand works well)

Small pots or a garden bed that gets plenty of sunlight
- Gravel or small rocks to improve drainage if planting in the ground
When to start:
This wildflower is native to dry, rocky areas and blooms best in cooler spring weather. If you're starting from seeds, it's best to sow them in late fall or early winter so they experience a natural cold period (this helps them germinate). If you’re using young plants, plant them in early spring.
Finding a good spot:
The Last Chance Townsend Daisy loves full sun! It needs at least 6 hours of direct sunlight every day. Since it’s used to rocky, dry environments, make sure your planting area has excellent drainage. If your soil tends to hold water, consider adding gravel or sand to help it drain better.
Tip: These daisies are tough but prefer cooler climates, so avoid planting them in extremely hot or humid areas.
Planting
If you have seeds:
- Scatter the seeds on the surface of the soil—don’t bury them too deep! Just press them lightly into the soil.
- Water gently to keep the soil moist but not soaking wet.
- Cover the container or bed with a thin layer of fine gravel to protect the seeds and improve drainage.
- Place the container in a sunny spot where it will stay cool during the winter months. The seeds will naturally sprout when the weather warms up in spring.
If you have young plants:
- Dig a hole slightly larger than the root ball of the plant.
- Place the plant in the hole, making sure the top of the root ball is level with the surrounding soil.
- Fill in around the plant with your soil mixture (add sand if needed for extra drainage).
- Water thoroughly after planting to help the roots settle in.
Spacing tip: Space the plants about 6-8 inches apart to give them room to grow without overcrowding. This also ensures good airflow around the plants, which helps prevent disease.
Growing Care
Watering:
- Once established, these daisies don’t need much water. They’re used to dry conditions, so water sparingly—only when the soil feels completely dry.
- In the first few weeks after planting, water just enough to keep the soil lightly moist while the roots get settled.
- After that, let nature do most of the work! Unless you’re in an unusually dry spell, they should thrive without extra watering.
Feeding:
- These wildflowers are low-maintenance and don’t require heavy feeding. A light sprinkle of a general-purpose fertilizer once a year in early spring is enough.
- Too much fertilizer can actually harm them, as they prefer poor, rocky soils.
Sunlight:
- Make sure they’re getting plenty of sunlight—at least 6 hours a day. If they don’t get enough sun, they may become leggy and produce fewer flowers.
Protecting from pests:
- These daisies are pretty hardy and don’t attract many pests. However, if you notice any bugs, simply spray the plant gently with water to knock them off.
- If slugs or snails are a problem, sprinkle some crushed eggshells or diatomaceous earth around the base of the plant to deter them.
Winter care:
- This plant is used to cold climates, so it doesn’t need special protection during the winter. Just let it go dormant naturally, and it will come back strong in the spring.
Harvesting
Enjoying the blooms:
- The Last Chance Townsend Daisy produces beautiful daisy-like flowers with yellow centers and white petals. These typically bloom in early to mid-spring, depending on your climate.
- You won’t harvest these flowers in the traditional sense (like vegetables), but you can cut a few stems to bring indoors for a lovely, simple bouquet.
- To do this, use clean scissors or pruning shears to cut the flower stem close to the base of the plant. This encourages the plant to produce more blooms!
Collecting seeds:
- If you want to save seeds for next year, wait until the flowers fade and seed heads form. Once the seed heads dry out (usually by late spring or early summer), gently collect the seeds and store them in a cool, dry place until you’re ready to plant again.
- Be sure to label your seeds so you remember what they are!
End-of-season care:
- Once the blooming period is over, you can leave the plant be. It will naturally go dormant as the weather warms up. Don’t worry—it’ll come back next spring!
Plant Care FAQ
Q: My daisies aren’t blooming. What could be wrong?
A: These daisies need lots of sunlight to bloom. If they’re in too much shade, they might not flower. Also, check if the soil is too rich or wet; they prefer poor, well-draining soil.
Q: How do I know if I’m watering too much?
A: Overwatering can cause the leaves to turn yellow or rot at the base. If the soil feels soggy for days after watering, you’re giving them too much. Let the soil dry out completely between waterings.
Q: Can I grow these in containers?
A: Yes, you can! Just make sure the container has excellent drainage holes and use a sandy soil mix. These daisies are great for rock gardens or containers because they like dry conditions.
Q: Do these plants need fertilizing?
A: Not really. These daisies are adapted to poor soils and don’t need much feeding. If you feel the need to fertilize, use a very light application of a general-purpose fertilizer in early spring.
Q: Are these plants deer-resistant?
A: While no plant is completely deer-proof, these daisies are not typically a favorite snack for deer due to their tough, fibrous leaves. However, hungry deer might still nibble, so keep an eye out if you live in an area with a lot of wildlife.
Pro Tips
1. Rock garden gem
These daisies look stunning in rock gardens or along pathways where drainage is naturally excellent. Pair them with other drought-tolerant plants for a beautiful, low-maintenance display.2. Less is more
Remember, these plants love neglect! Overwatering or over-fertilizing can actually harm them, so resist the urge to baby them too much.3. Companion planting
Plant these daisies alongside other native wildflowers or drought-tolerant plants like lavender or sedum for a natural, meadow-like look.4. Natural pest control
These daisies attract beneficial insects like bees and butterflies, which can help pollinate other plants in your garden.5. Save those seeds
Collecting seeds each year is a great way to expand your daisy patch or share with friends. Plus, it’s a fun way to connect with the natural lifecycle of the plant.6. Winter sowing
If you’re starting from seeds, try sowing them outdoors in winter. The cold period helps break down the seed coat and improves germination rates when spring arrives.7. Cut flower delight
Although these daisies are small, they make cute additions to bouquets. Pair them with other wildflowers for a rustic, natural look.