
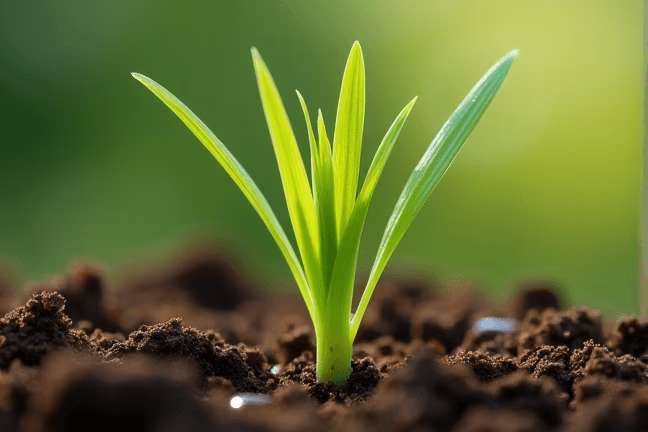
Orange Daylily
Hemerocallis fulva
Grow Time
60-90 days
Sunlight
Full Sun to Partial Shade
Watering
Every 5-7 days
Toxicity
Non-toxic
Video content from YouTube
Watch on YouTubeHow to plant Orange Daylily: Step-by-Step Guide
Growing Guide
Preparation

Choosing the Right Spot: Orange Daylilies are pretty easy-going plants, but they do love sunlight! While they can handle a bit of shade, aim for a spot that gets at least 6 hours of sun each day. If you're planting in a garden bed, make sure it's an area where water doesn't pool after rain—Daylilies like well-draining soil.
What You'll Need:

A shovel or trowel

Compost or organic matter (to mix with your soil if it’s too sandy or heavy with clay)

Mulch (optional, to help keep moisture in)
- Orange Daylily bulbs or young plants (available at most garden centers)
When to Plant: Spring and fall are the best times to plant Orange Daylilies because the weather is mild, and they’ll have time to settle in before extreme temperatures hit. If you live in a warmer climate, fall might be ideal; in cooler areas, spring planting works better.
Tip: If you’re buying bulbs, look for ones that feel firm—not soft or mushy.
Planting
If Using Bulbs:
- Dig a hole about 8-10 inches deep—this gives the roots plenty of room to spread out.
- Place the bulb in the hole with the pointy end facing up.
- Fill the hole halfway with soil, then water lightly to settle the soil around the bulb.
- Finish filling the hole with the remaining soil and gently pat it down.
- Water again, but don’t overdo it—just enough to moisten the soil.
If Using Young Plants:
- Dig a hole slightly larger than the root ball of the plant.
- Carefully remove the plant from its container, loosen the roots a bit if they’re tightly packed, and place it in the hole.
- Backfill the hole with soil, making sure the base of the plant is level with the ground.
- Gently press the soil around the plant to secure it in place.
- Water thoroughly after planting.
Spacing Tip: Leave about 18-24 inches between each plant. This gives them enough room to grow without competing for nutrients.
Growing Care


Watering: Daylilies are pretty drought-tolerant once they’re established, but they still need regular watering during their first growing season. Aim to water them deeply once a week if there hasn’t been much rain. In hot, dry spells, you might need to water twice a week.
Fertilizing: You don’t need to go overboard with fertilizer. A light application of balanced fertilizer (like a 10-10-10) in early spring and again just after the first blooms will keep them happy. Too much fertilizer can lead to lots of leaves but fewer flowers.
Mulching: Adding a layer of mulch around the base of the plant helps keep the soil moist and prevents weeds from taking over. Just make sure the mulch isn’t piled up against the stems, as this can cause rot.
Pruning: After the flowers fade, you can snip off the spent blooms (this is called "deadheading"). It keeps the plant looking tidy and encourages more blooms. Once all the flowers are done for the season, cut back the tall flower stalks to the base of the plant.
Tip: Don’t worry if the leaves turn yellow in late summer—it’s normal for older leaves to die back as new ones grow.
Harvesting


Wait, Harvesting? Technically, Orange Daylilies aren’t grown for harvesting in the traditional sense (you’re not picking fruit or veggies), but you can enjoy their blooms in other ways! Each flower only lasts for one day (hence the name “Daylily”), but a healthy plant produces many flowers throughout the summer.
Cutting Flowers for Bouquets: If you want to bring some of those vibrant orange blooms indoors:
- Cut the flower stem early in the morning when the bloom is just starting to open.
- Place it in water right away to enjoy indoors.
- Remember, each flower only lasts a day, so you may need to replace them daily.
Leaves and Roots (Optional): While we don’t typically harvest Daylilies for food, some people use the flowers in salads or as garnishes. The young shoots and roots are also edible, though this is less common. Always be cautious and research thoroughly before consuming any part of a plant!
Plant Care FAQ
Q: Do Orange Daylilies spread?
A: Yes, they can spread over time by forming new clumps through their roots. If they start getting too crowded, you can divide them every few years to keep them healthy and prevent overcrowding.
Q: My Daylilies aren’t blooming—what’s wrong?
A: There could be a few reasons:
- They might not be getting enough sunlight.
- Too much fertilizer can lead to lush green growth but fewer flowers.
- They could be overcrowded and need dividing.
Q: Can I grow Daylilies in containers?
A: Absolutely! Just make sure the container is large enough (at least 12 inches deep) and has good drainage. Keep in mind that potted Daylilies may need more frequent watering.
Q: Are Orange Daylilies invasive?
A: They can spread quite easily and might be considered invasive in some areas. If you want to control their spread, consider planting them in contained areas or pots.
Q: Why are the leaves turning brown?
A: Brown leaves could be due to several factors: too much or too little water, pest damage, or natural aging. Check the soil moisture and inspect for pests. Older leaves naturally die back as the plant grows.
Pro Tips
1. Divide and Conquer
Every 3-4 years, dig up your Daylily clumps and divide them. This not only keeps the plants healthy but also gives you more Daylilies to plant elsewhere or share with friends!2. Natural Weed Barrier
Daylilies are great at crowding out weeds. Once established, they form dense clumps that can help suppress weed growth in your garden.3. Extend Blooming Time
Deadhead regularly to encourage more blooms. Removing spent flowers tells the plant to focus energy on producing new ones.4. Companion Planting
Pair Daylilies with other perennials like Black-Eyed Susans or Coneflowers. Their different bloom times and heights create a beautiful, long-lasting display.5. Low-Maintenance Beauty
Daylilies are perfect for beginners because they’re tough and forgiving. Even if you forget to water them occasionally, they’ll bounce back quickly.6. Pest Resistance
Daylilies are rarely bothered by pests or diseases, making them a hassle-free addition to your garden. However, watch out for aphids in particularly wet seasons.7. Winter Care
In colder climates, add a layer of mulch in late fall to protect the roots during winter. Remove the mulch in spring when new growth appears.