
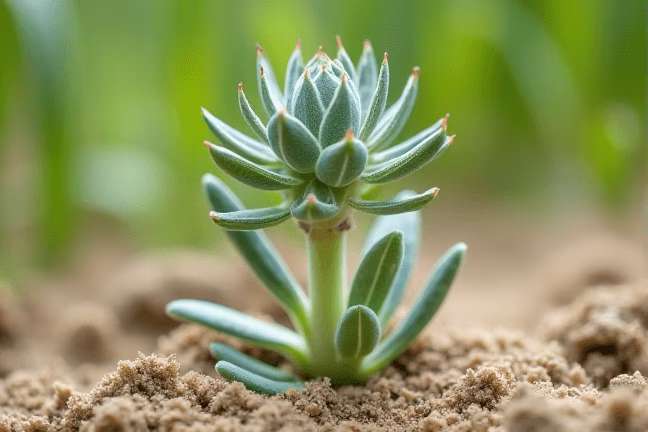
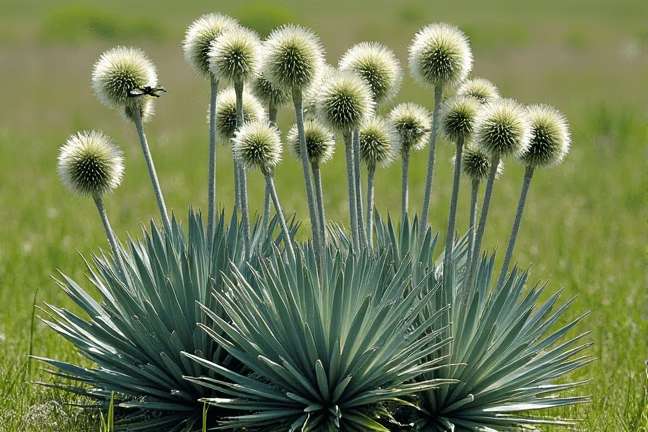
Rattlesnake Master
Eryngium yuccifolium
Grow Time
90-120 days
Sunlight
Full Sun
Watering
Every 5-7 days
Toxicity
Non-toxic
Video content from YouTube
Watch on YouTubeHow to plant Rattlesnake Master: Step-by-Step Guide
Growing Guide
Preparation

Choosing the Right Spot: Rattlesnake Master, with its cool spiky leaves and unique globe-shaped flowers, is a pretty low-maintenance plant. It’s perfect for adding texture to your garden. You’ll want to pick a sunny spot because this plant thrives in full sunlight — at least 6 hours of direct sun each day.
Soil Needs: One of the best things about Rattlesnake Master is that it’s not picky about soil. It can handle sandy, dry, or even poor soils without any complaints. However, it does need good drainage. If your soil tends to hold water (like heavy clay), mix in some sand or gravel to help it drain better.
Tools & Materials:
- Seeds or young plants
- A trowel or small shovel
- Garden soil or native soil (with possible amendments like sand)
- Watering can
When to Start: Spring is the ideal time to plant Rattlesnake Master. The soil should be warm enough for seeds to germinate, but if you’re using young plants from a nursery, they can go in the ground as soon as the danger of frost has passed.
Tip: If you're starting with seeds, soak them in water overnight before planting. This helps speed up germination!
Planting
If Using Seeds:
- Prepare the soil by loosening it with a trowel.
- Scatter the pre-soaked seeds over the soil surface, spacing them about 18 inches apart.
- Lightly press the seeds into the soil but don’t bury them too deep — just a light covering of soil will do.
- Water gently after planting to keep the soil moist while the seeds sprout.
If Using Young Plants:
- Dig a hole slightly larger than the root ball of the plant.
- Place the plant in the hole, making sure the top of the root ball is level with the surrounding soil.
- Backfill the hole with soil, gently pressing it down around the plant to remove any air pockets.
- Water thoroughly right after planting.
Spacing Tip: Give each plant plenty of room to grow — around 18-24 inches apart — since Rattlesnake Master can spread a bit as it matures.
Growing Care


Watering: Once established, Rattlesnake Master is quite drought-tolerant, meaning it doesn’t need much extra water. During the first growing season, water regularly to help the roots settle in, especially if you’re experiencing a dry spell. After that, only water during long periods without rain.
Fertilizing: Here’s the great news: you don’t really need to fertilize Rattlesnake Master. It’s a tough plant that prefers lean, nutrient-poor soils. Over-fertilizing might actually harm it by encouraging too much soft growth.
Sunlight: As mentioned earlier, this plant loves the sun! Make sure it gets plenty of direct sunlight throughout the day. If it’s in a shady spot, it might get leggy and not flower as well.
Pruning: You won’t need to prune much, but you can trim back any dead or damaged leaves in early spring to keep the plant looking tidy. Deadheading (removing spent flowers) isn’t necessary but can help the plant focus its energy on new growth.
Pests & Problems: Rattlesnake Master is pretty resistant to pests and diseases. Occasionally, aphids might show up, but they’re usually not a big problem. If you see them, spray the plant with a strong jet of water to knock them off.
Harvesting
When to Harvest Seeds: If you want to collect seeds from your Rattlesnake Master, wait until the flower heads have dried out and turned brown, usually in late summer or early fall. You can then cut the flower stalks and shake the seeds loose over a bowl or paper bag.
How to Store Seeds: Store the seeds in a cool, dry place in a paper envelope or a jar with a lid. Label it with the date so you remember when you collected them. These seeds can be used to grow more Rattlesnake Master next season!
Using in Arrangements: The dried flower heads are also great for floral arrangements. Simply cut them when they’re fully dry and use them in bouquets or wreaths for a unique touch.
Tip: If you don’t harvest the seeds, leave the flower heads on the plant. Birds and other wildlife love feasting on them during the winter months!
Plant Care FAQ
Q: My Rattlesnake Master looks droopy. What should I do?
A: Don’t panic! This plant may droop a bit during very hot weather, but it will perk back up once it cools down. If the soil feels dry, give it a good drink of water.
Q: Do I need to deadhead the flowers?
A: Not really! Deadheading isn’t essential, but if you prefer a tidier look, feel free to snip off spent blooms. Leaving them on provides food for birds and can lead to self-seeding.
Q: Can I grow Rattlesnake Master in containers?
A: Yes, but make sure the container is large enough (at least 12 inches deep) and has excellent drainage. Remember, this plant likes dry conditions, so avoid overwatering in pots.
Q: Is Rattlesnake Master deer-resistant?
A: Absolutely! Its tough, spiky leaves make it unappealing to deer and rabbits, which is a bonus if you live in an area where these critters are common.
Q: Why aren’t my Rattlesnake Master plants flowering?
A: It could be due to insufficient sunlight or overcrowding. Make sure your plants are getting enough sun and space to thrive. Also, note that younger plants may take a year or two to start flowering.
Pro Tips
1. Native Plant Benefits
Since Rattlesnake Master is native to North America, it supports local pollinators like bees and butterflies. Adding it to your garden is a win-win for you and nature!2. Companion Planting
Pair it with other drought-tolerant plants like coneflowers or black-eyed Susans for a low-maintenance, pollinator-friendly garden bed.3. Natural Erosion Control
Thanks to its deep taproot, Rattlesnake Master is excellent for stabilizing soil on slopes or areas prone to erosion.4. Seasonal Interest
Even in winter, the dried flower heads add visual interest to your garden. Consider leaving them through the colder months for added texture.5. Avoid Overwatering!
Once established, this plant thrives on neglect. Resist the urge to water too often, especially in heavy soils.6. Wildlife-Friendly
Let the seeds mature on the plant if you want to attract birds like goldfinches to your garden.7. Easy Propagation
If you want more plants, simply let some seeds fall naturally. They’ll often germinate on their own, giving you free new plants!