
Turmeric
Curcuma longa
Grow Time
240-300 days
Sunlight
Partial Shade
Watering
Every 3-5 days
Toxicity
Non-toxic
Video content from YouTube
Watch on YouTubeHow to plant Turmeric: Step-by-Step Guide
Growing Guide
Preparation

Getting Ready to Grow Turmeric:
Turmeric is a close cousin of ginger and thrives in warm, humid climates. If you live in a cooler region, don’t worry—turmeric grows just fine indoors too!
What You’ll Need:
- Fresh turmeric rhizomes (you can find these at health food stores or online)
- Well-draining soil or potting mix (a mix made for tropical plants works well)
- A large pot with drainage holes (at least 12 inches deep and wide) if growing indoors
- A sunny spot in your garden if planting outside
When to Start: Turmeric loves warmth, so it’s best to plant in spring when the weather is consistently above 68°F (20°C). If you’re starting indoors, you can begin as early as late winter.
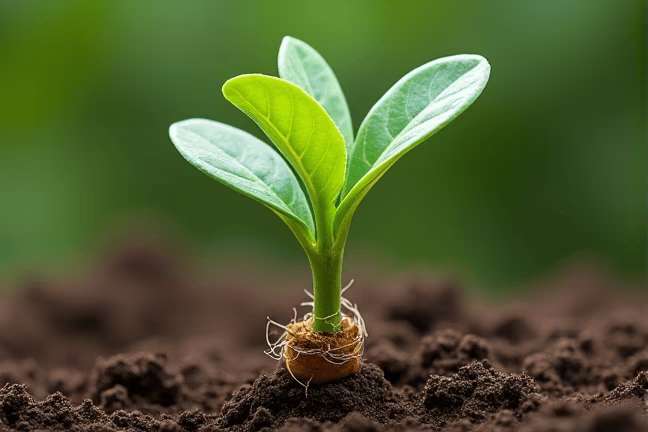
Choosing Rhizomes: Look for plump, firm rhizomes with little "eyes" or buds. These are the points where new growth will sprout. Avoid any that look dry or shriveled.
Tip: If you can’t find fresh rhizomes locally, many garden centers sell them online or you can order from specialty growers.
Planting
How to Plant Your Turmeric:
- Prepare the Soil: Turmeric likes loose, rich soil. Mix some compost into your potting soil or garden bed to give it a nutrient boost.
- Break Up the Rhizome: If your rhizome has multiple buds, you can break it into smaller pieces. Each piece should have at least 2-3 buds. This way, you'll grow more plants!
- Planting Depth: Place each piece of rhizome about 2 inches (5 cm) deep in the soil, with the buds facing upwards. Space them out about 6-8 inches apart if you're planting multiple rhizomes.
- Water Lightly: After planting, water the soil lightly to settle it, but don’t soak it. Keep the soil moist but not soggy.
- Where to Place It: If you're planting outdoors, choose a spot with partial shade. Indoors? Place the pot near a bright window or under grow lights. Turmeric doesn't need full sun, but it does enjoy bright, indirect light.
Tip: Don’t bury the rhizome too deep—it needs room to sprout easily!
Growing Care


Caring for Your Growing Turmeric:
- Watering: Turmeric likes consistent moisture, especially during its active growing phase. Water when the top inch of soil feels dry—usually once or twice a week, depending on how warm and dry your environment is. Be careful not to overwater, though, as soggy soil can cause rot.
- Humidity: Since turmeric comes from tropical regions, it loves humidity. If you’re growing it indoors, mist the leaves occasionally or place a shallow tray of water near the plant to increase moisture in the air.
- Feeding: Feed your turmeric every 4-6 weeks with a balanced liquid fertilizer, especially during the growing season. Alternatively, you can use compost tea if you prefer organic options.
- Sunlight Needs: Turmeric prefers dappled sunlight or partial shade. If you notice the leaves turning yellow or looking scorched, it might be getting too much direct sun. Move it to a shadier spot or filter the light with a sheer curtain.
- Pests and Problems: Turmeric isn’t prone to many pests, but watch out for spider mites if you’re growing indoors. If you see tiny webs or speckled leaves, increase humidity around the plant or gently wash the leaves with water.
Tip: As the plant grows, you can add mulch (like straw or bark) around the base to help retain moisture and keep the soil cool.
Harvesting


When and How to Harvest Turmeric:
Turmeric takes about 8-10 months to mature, but you can harvest small amounts earlier if needed. Here’s how to know when it’s ready:
- Signs of Readiness:
- The leaves will start to yellow and die back. This is a good sign that the rhizomes underground are fully developed.
- If you planted in spring, expect to harvest around late winter or early spring of the following year.
- Digging Up the Rhizomes:
- Use a small hand trowel or fork to gently dig around the base of the plant. Be careful not to damage the rhizomes.
- Once unearthed, shake off excess soil and rinse the rhizomes under cool water.
- Using Fresh Turmeric:
- Fresh turmeric can be used immediately in cooking or grated into smoothies. Just peel the skin with a spoon before using.
- You can also dry and grind it into powder for longer storage.
Tip: If you only need a small amount, you can carefully dig up part of the rhizome without disturbing the rest of the plant, allowing it to continue growing.
Plant Care FAQ
Q: Can I grow turmeric indoors all year round?
A: Yes, absolutely! Turmeric makes a great houseplant. Just make sure it gets enough bright, indirect light and stays warm. If your home is particularly dry, consider increasing humidity by misting the leaves or using a humidifier.
Q: Why are my turmeric leaves turning yellow?
A: Yellowing leaves could mean overwatering, underwatering, or too much direct sunlight. Check the soil—if it’s soggy, let it dry out a bit before watering again. If the plant seems dry, water more frequently. Also, try moving it to a shadier spot.
Q: Do I need to prune my turmeric plant?
A: No heavy pruning is necessary, but you can trim away any dead or yellowing leaves to keep the plant tidy and healthy. This also helps redirect energy toward the rhizomes.
Q: Can I replant harvested turmeric rhizomes?
A: Definitely! Save a few healthy rhizomes and replant them to grow another crop. Just wait until the weather warms up again if you're planting outside.
Q: What should I do with the plant after harvesting?
A: After harvesting, you can either discard the plant or let it rest. If you want to try for another crop, reduce watering and let the plant go dormant for a few months. Then, start watering again to encourage new growth.
Pro Tips
- 1. Grow More Than One Variety:
There are different varieties of turmeric, including ones with white or red flesh. Experiment with a few types to see which performs best in your climate. - 2. Cook with Fresh Turmeric:
Fresh turmeric has a brighter, more vibrant flavor than dried. Add it to soups, curries, or even tea for an extra kick of flavor and health benefits. - 3. Reuse Old Rhizomes:
Instead of buying new rhizomes each year, save a few from your last harvest. This saves money and ensures you always have a supply. - 4. Pair with Ginger:
If you like growing turmeric, try growing ginger alongside it—they both love similar conditions and make great companions. - 5. Freeze Extra Harvest:
If you have more turmeric than you can use fresh, chop it up and freeze it. It retains its flavor well and thaws quickly for cooking. - 6. Prevent Overwatering:
To avoid root rot, ensure your pot or garden bed has excellent drainage. Adding sand or perlite to the soil mix can improve drainage. - 7. Use Turmeric Leaves Too:
The leaves are edible and can be used to wrap foods for steaming, adding a subtle turmeric flavor. Don’t let them go to waste!